
HAProxy를 이용한 이중화 구성 ( Docker )
https://www.haproxy.com/blog/how-to-run-haproxy-with-docker
How to Run HAProxy with Docker (In-Depth Guide)
In this blog post, you’ll learn why you might consider running HAProxy inside a Docker container and what the ramifications could be.
www.haproxy.com
위 문서의 내용을 바탕으로 HAProxy를 이용하여 이중화를 구성해보자.
구성
- haproxy -> web01 / web 02
- 이때 web01과 web02중 healthy한 도커 컨테이너로 트레픽이 전달되게 구성해보자.
이중화 구성을 위해 bridge 타입의 도커 네트워크를 생성한다.
- docker network create --driver=bridge mynetwork
- docker network ls 명령어로 생성된 bridge network 를 확인할 수 있다.

이중화 대상인 web01 서버와 web02 서버를 컨테이너로 생성한다.
docker run -d --name web01 --net mynetwork jmalloc/echo-server:latest
docker run -d --name web02 --net mynetwork jmalloc/echo-server:latest
haproxy를 위한 설정파일을 생성한다.
- 설정파일을 미리 준비해보자. /data/haproxy/web-lb 하위 디렉토리에 haproxy.cfg 라는 파일 생성.
- haproxy.cfg 파일의 내용은 다음과 같다.
global
  stats socket /var/run/api.sock user haproxy group haproxy mode 660 level admin expose-fd listeners
  log stdout format raw local0 info

defaults
  mode http
  timeout client 10s
  timeout connect 5s
  timeout server 10s
  timeout http-request 10s
  log global

frontend stats
  bind *:8404
  stats enable
  stats uri /
  stats refresh 10s

frontend myfrontend
  bind :80
  default_backend webservers

backend webservers
  server s1 web01:8080 check
  server s2 web02:8080 check
위 내용중 backend webservers 하위의 web01:8080 , web02:8080은 각각 {컨테이너명}:{사용포트}를 의미한다.
이제 haproxy를 컨테이너 기반으로 다음 명령어를 통해 생성한다.
docker run -d \
   --name haproxy \
   --net mynetwork \
   -v /data/haproxy/web-lb:/usr/local/etc/haproxy:ro \
   -p 80:80 \
   -p 8404:8404 \
   haproxytech/haproxy-alpine:2.4
--net 부분에는 방금 생성한 bridge 타입의 network의 명칭을 기입해주어야하며(mynetwork), -v 옵션에는 haproxy.cfg가 위치한 디렉토리명을 입력해야 (/data/haproxy/web-lb) haproxy 컨테이너 내부에서 방금 생성한 설정파일을 사용할수 있다.
이제 curl 명령어를 이용하여 정상적으로 로드밸런싱이 잘 되는지 확인해보자.
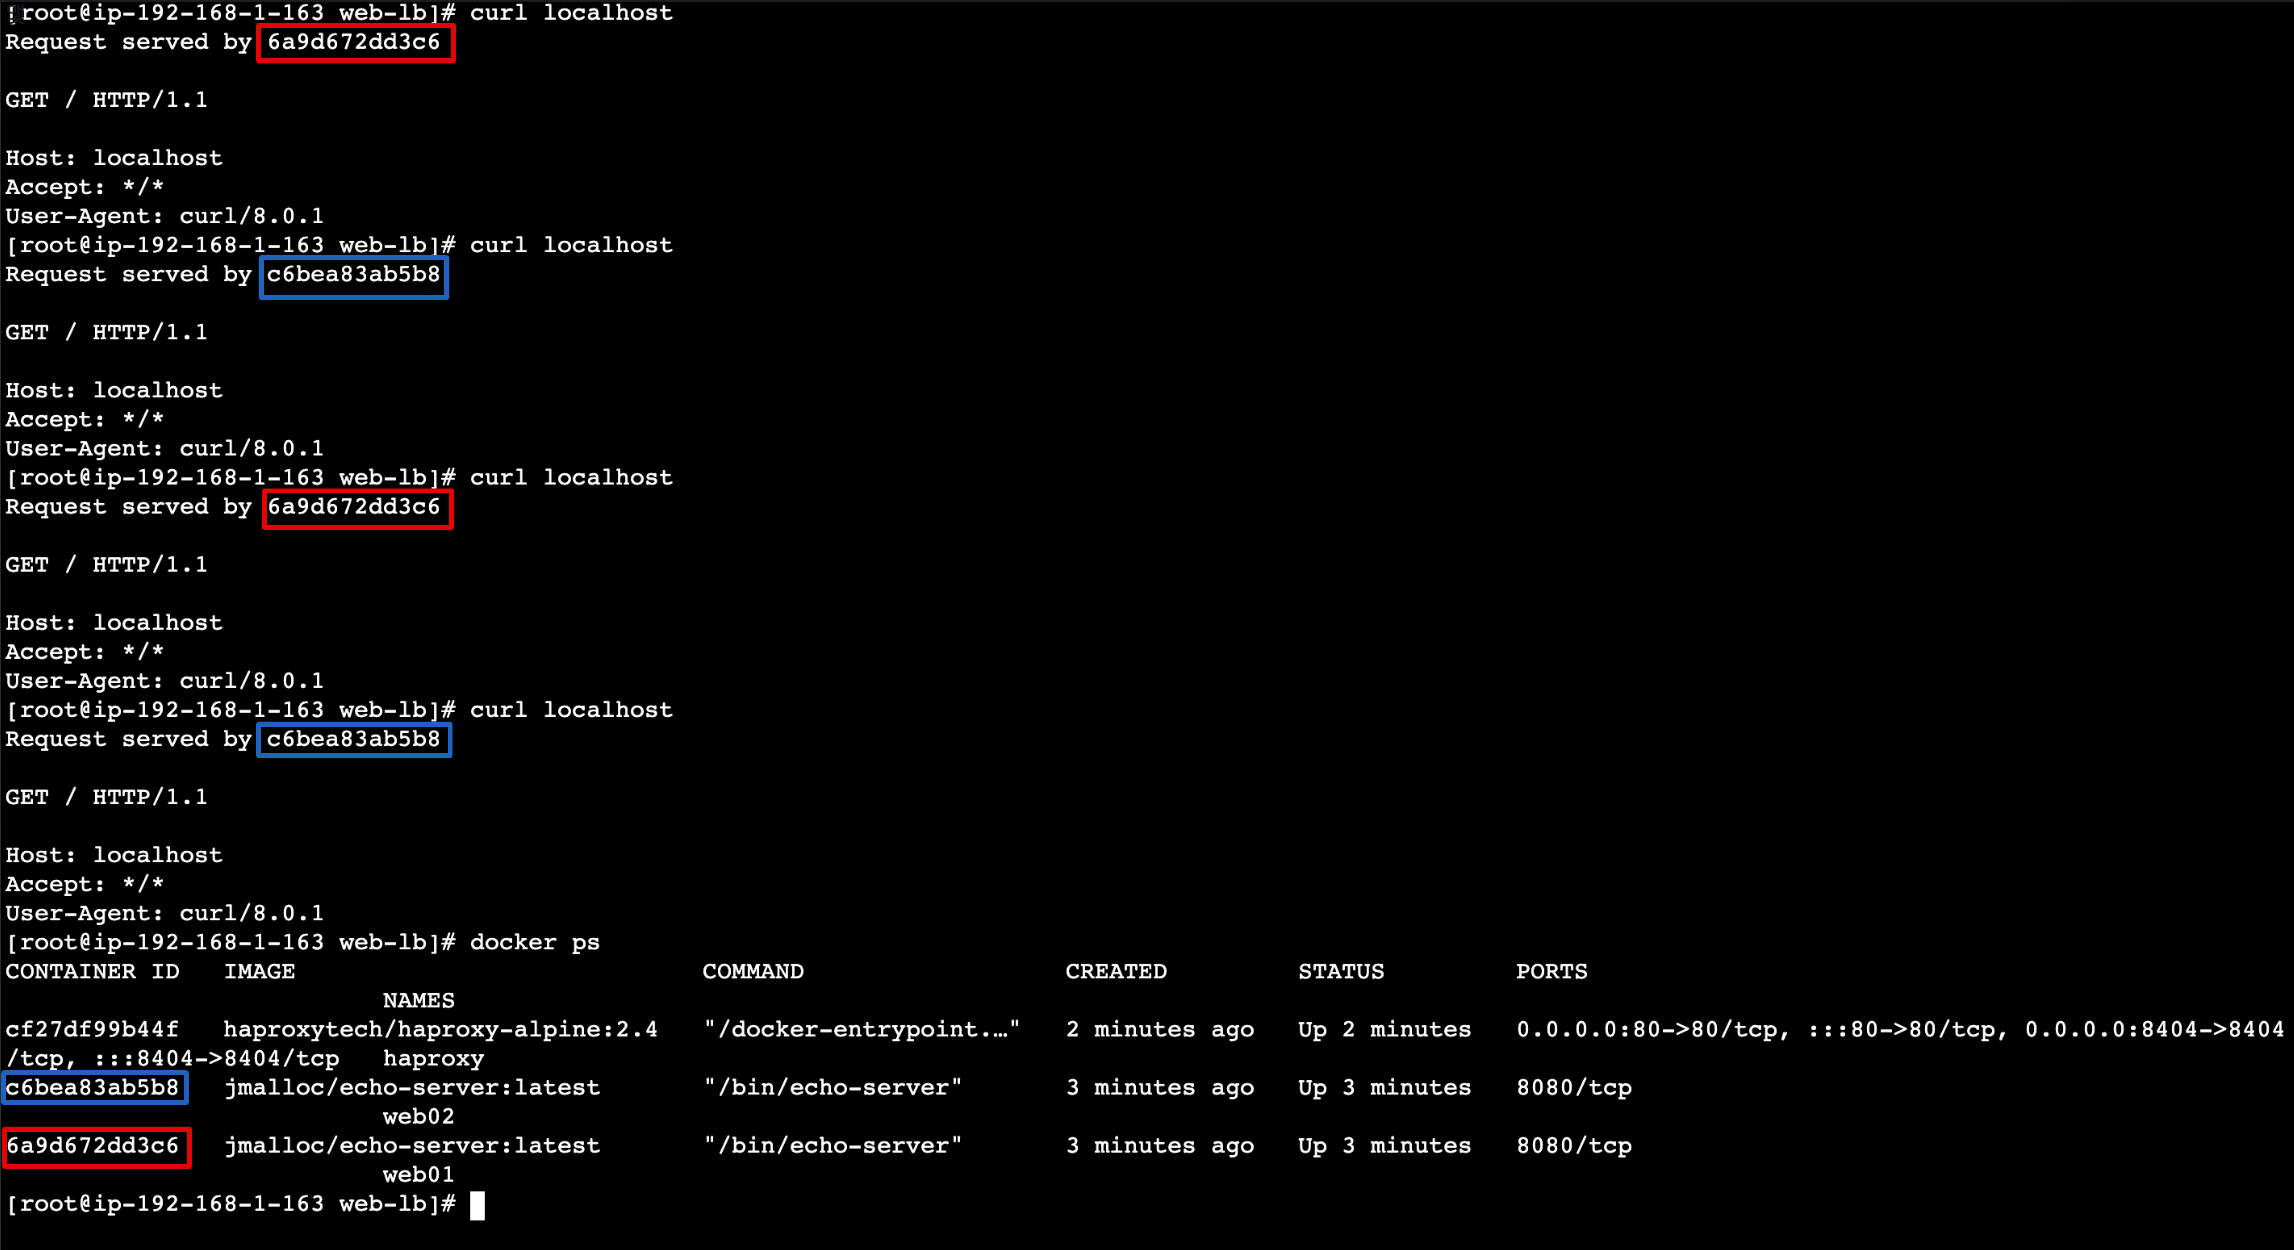
Request served by부분을 확인해보면 curl localhost의 결과가 web01 / web02컨테이너에서 번갈아가면서 응답이 오는것을 확인할 수 있다.
마지막으로 이중화 구성이 잘 되었는지 web01서버의 도커 컨테이너를 stop 한 뒤에 web02로만 트레픽이 전달되는지 확인해보자.
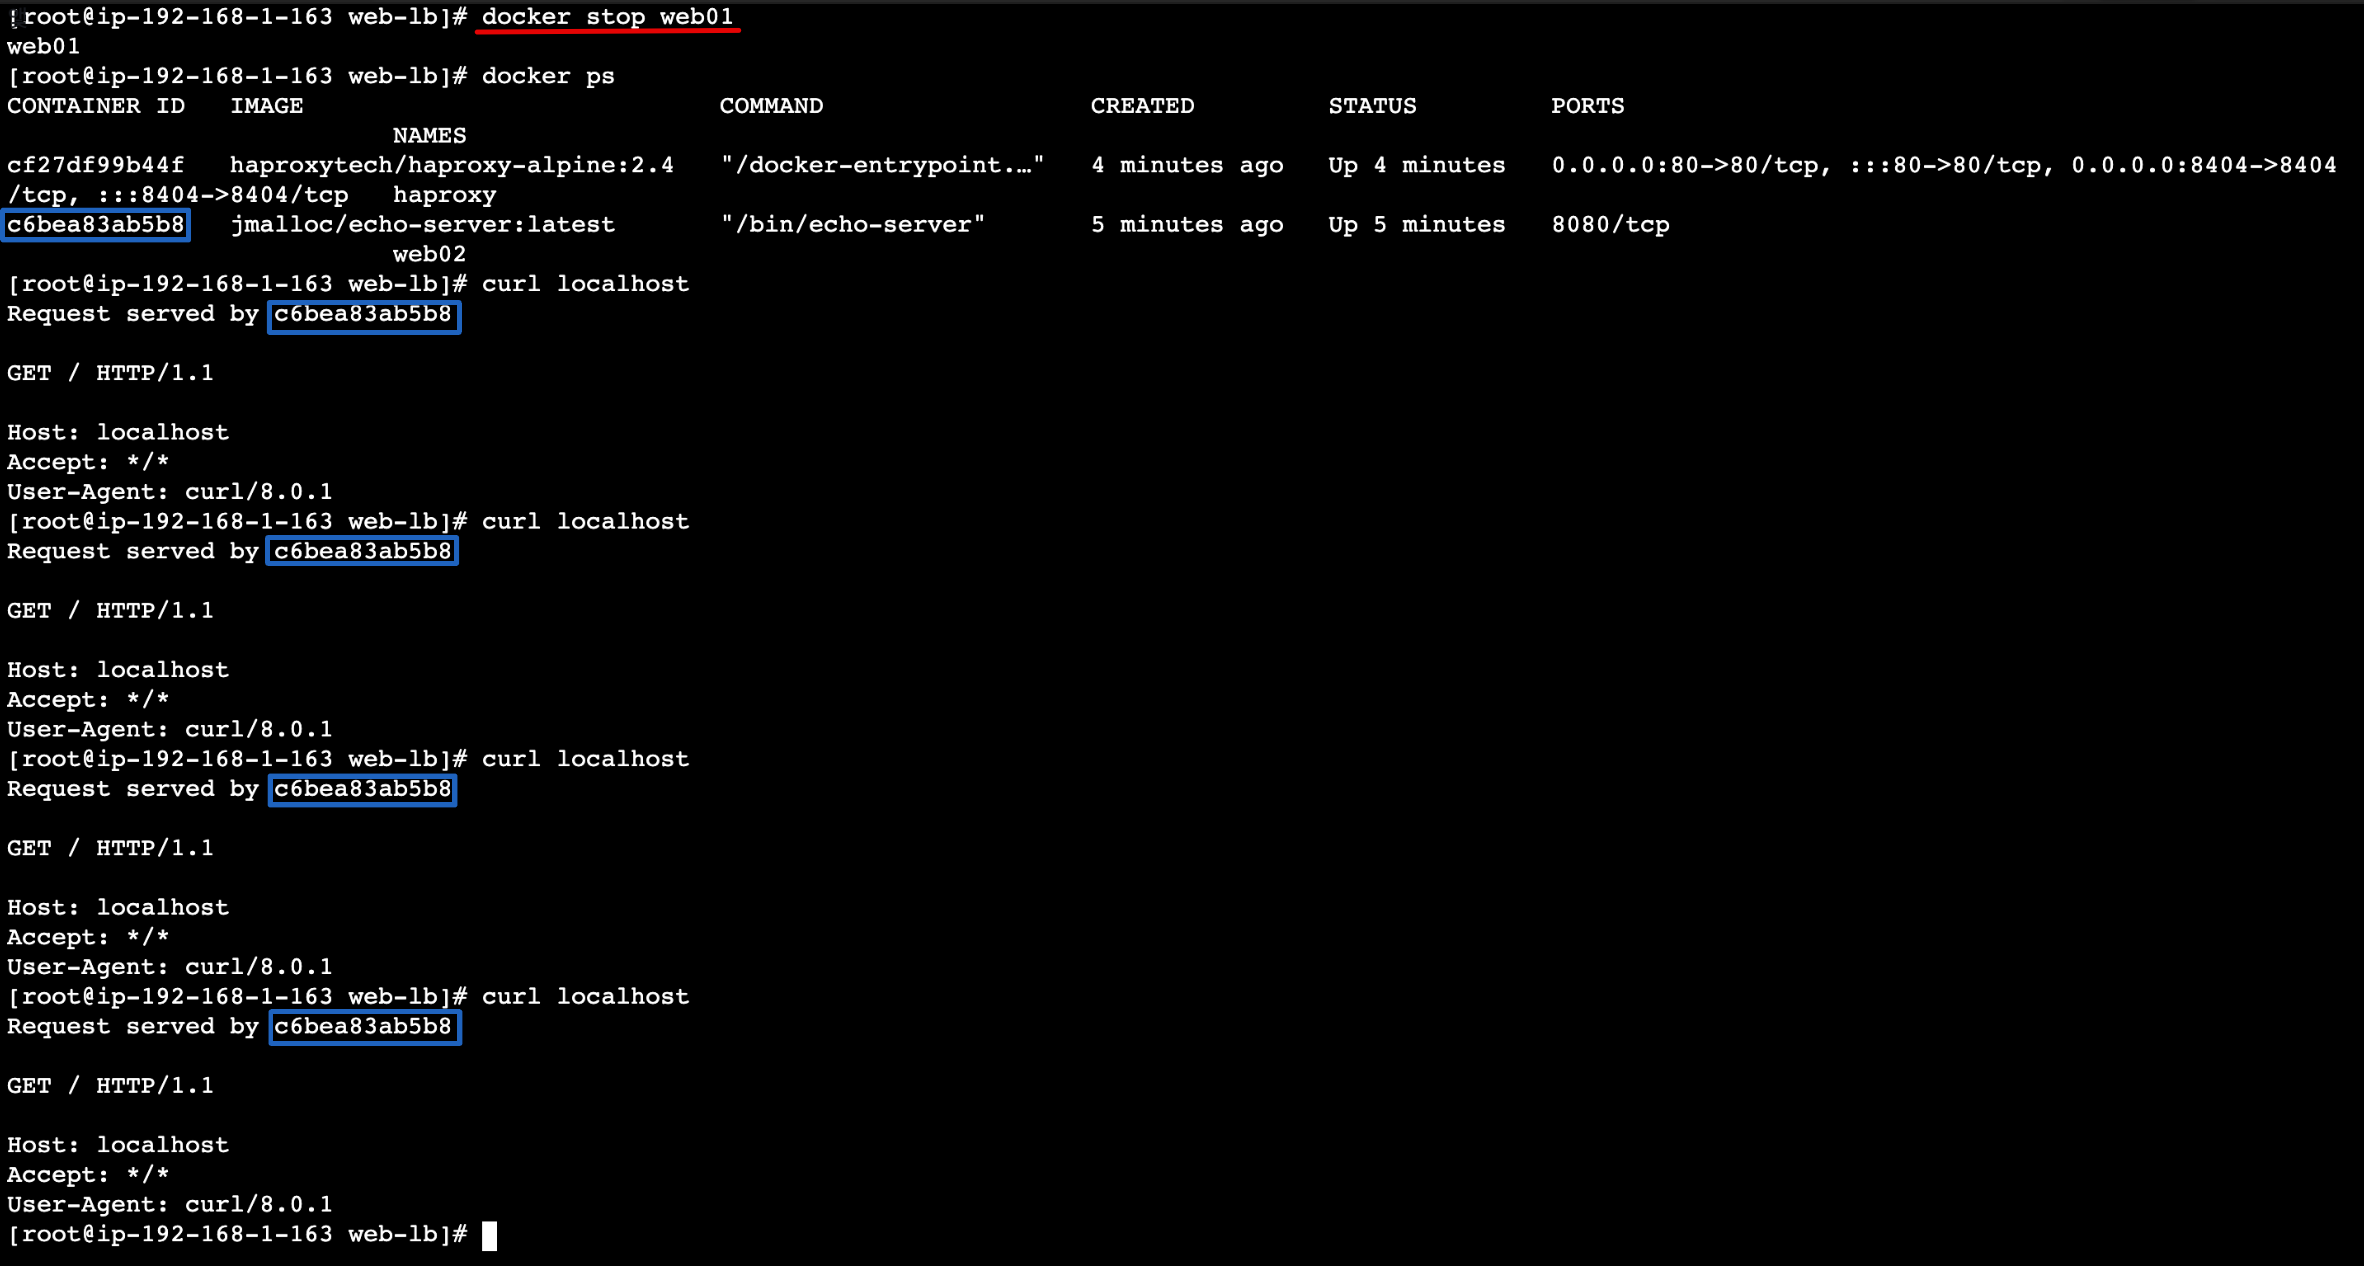
web01 컨테이너 stop 이후에 curl localhost 를 반복적으로 호출하니 web02로부터만 응답이 오는것을 확인할 수 있다.
즉 haproxy를 통해 web01 / web02 컨테이너로 이중화 구성 시 설정파일의 값에 따라 컨테이너의 상태를 확인하여 정상적으로 응답하는 컨테이너로만 요청이 전달됨을 확인할 수 있다.